8 Aug 2011

KFC Zinger Burger


KFC Zinger - Kentucky Fried Chicken, a crispy shell followed by a creamy layer and tender perfectly spiced chicken.


Today I am being very generous and sharing my two secret recipes; KFC Zinger and garlic sauce. Yes, this recipe is as close as you can come to KFC Zinger. I can even go so far as to say that you might even not be able to tell a difference. I found this amazing recipe on a google search while I was searching for "KFC copycat" recipe a long time ago (I do not remember what website). The secret is the creamy batter and the corn flakes to make it really delicious and crispy. I have been making it a couple of times since then and have been loved by both old and young eaters.
The spices just comes out so perfectly combined and the crispiness of the shell is amazingly crunchy. And the recipe is quite easy, done in three steps only.


NB! If you want to make the KFC Zinger burgers that are put in between a burger bread, you need to use boneless chicken fillets. If you just want to have KFC with some pommes frites or other sides, you may use any piece of chicken, boneless or with bones.


Makes 4 - 6 servings


I n g r e d i e n t s


4 - 6 chicken breast fillets or
4 - 6 chicken pieces, any kind


Marinade


1 ts salt
1 ts black pepper
1/2 ts mustard, ground
1 ts vinegar


1. Combine salt, pepper, mustard and vinegar and rub on the chicken


Let marinate at for least 1 hour or preferabely over-night (chicken will absorb the spices better and result in more flavorful taste)


Batter


3 tbsp flour
1 ss cornstarch
1/2 tsp baking soda
1 egg
3 tbsp milk
1/2 tsp mustard, ground


1. Whisk all the ingredients together to a medium-thick batter (add more flour if the batter is too runny)


Breading


2,5 - 3 dl corn flakes
2,5 - 3 dl bread crumbs


1. Crush the corn flakes finely
2. Make the bread into fine crumbs in a food processor
3. Combine the corn flakes and bread crumbs


Preparing


1. Add the marinated chicken pieces to the batter and thickly coat the chicken pieces on all sides

2. Have some of the bead and corn flakes mix on a plate and carefully have the coated chicken on it, while you sprinkle crumbs on the upper side and then turns it around to coat all sides (do not have all at same time, because they tend to mix up with the batter to big, sticky crumbs that will not stick to the chickens)


3. Have the coated and breaded chickens on a clean plate


4. Fry in medium heated oil in a fryer for about 10 minutes or until golden brown in color


Serve immediately in burger buns (or with pommes frites), salad and garlic sauce!


Garlic Sauce


Now this is another amazing recipe which I also found a long time ago. This was supposed to be a copycat recipe of some Mc Donalds burger. I have been making this garlic sauce to every kind of food, burgers, chicken, pommes frites, you name it. My younger sister demands this sauce to almost everything she eats.


1,5 dl turkish or greek yoghurt / creme fraiche / sour cream
3 tsp mayonnaise
1/2 tsp cayenne pepper
2 tsp garlic powder
1/4 tsp sugar
1/2 tsp mustard, ground
1 dash of salt
1 tsp lake of pickles (pickles brine) or 1/2 tsp vinegar


1. Combine yoghurt and mayonnaise in a bowl
2. Add rest of the ingredients and mix until combined
3. Keep in fridge for atleast 1 hour, preferabely 4 hours for development of flavors


How to assemble KFC Zinger Burgers


4 hamburger buns
4 KFC Zinger fillets
4 burger cheese (optional)
4 tbsp garlic sauce
4 tbsp salsa sauce (optional)
4 iceberg lettuce or other lettuce flakes
pickles


1. Divide the burger buns in half and toast them lightly
2. Have cheese on the bottom, warm for a few seconds in the microwave until cheese just starts to melt
2. Add the zinger fillet on the bun topping it with garlic sauce and salsa sauce
3. Add pickles and lettuce and press down the burger bun top


Serve with pommes frites or just as they are!

5 Aug 2011

Chocolate Chip Walnut Brownies - Recipe Test


Chocolate Chip Walnut Brownies. I think the name tells it all. These brownies are described as creamy and moist by the baker, a new recipe I am testing out.

This is a brownies recipe from Leila Lindholm's new baking book "A piece of cake". I was so happy to see a new baking book by this swedish baker at the library, so I borrowed it right away. There were a lot of interesting recipes, but my eye caught the chocolate chip walnut brownies recipe which looked inviting. Even though I am more than satisfied with my old brownies recipe (which I will stick to from now on), I decided to give these a try. The difference between these and my recipe were not the ingredients, but the procedure. While my brownies starts by whisking sugar and eggs, this recipe asked to beat sugar and butter until light and creamy. The procedure of these brownies were just like the procedure of a cake, only the baking powder was missing.
These brownies were also topped with a fudge icing which I omitted.


I ended up with a cake-like texture on the brownies and I had my doubts to have let them in oven for too long. Freshly hot from the oven they did not really impress me, they were lacking the fudginess and stickiness of the typical brownies. To be honest they were also tasting like a cake and feedback from brownies lovers at home told me the same. Anyways, I had them in fridge overnight and the next day I could see they had become more chewy and they actually made good company to ice cream.


I am sharing the recipe for those who want to give these brownies a try. I would like feedback on your results.


Makes 12 brownies pieces


I n g r e d i e n t s


350 g butter, softened
6 dl sugar
3 dl cocoa powder
1/2 dl dark syrup *
6 egg, beaten
3 dl allpurpose flour
(400 g) white chocolate, roughly chopped
250 g walnuts, roughly chopped


* If you do not have light syrup available, you can make your own by adding 1,5 tbsp water and 1 tbsp brown sugar to 1 dl of light syrup


Preheat oven to 175C and cover a baking pan 30 x 30 cm with baking paper


1. Beat butter and sugar until pale and creamy


2. Whisk in cocoa powder and syrup (I added the cocoa powder at the end, because I was going to take out a little batch of batter for blondies, since my dad is not a huge fan of chocolate)


3. Beat in the eggs, one at a time


4. Fold in the flour


5. Add roughly chopped chocolate and walnuts in the batter


5. Pour the batter in prepared baking pan


Bake in the middle of oven for about 15 - 25 minutes, or till you stick in a baking pin and it comes out a bit sticky


Let the brownies cool while you prepare the fudge icing or just sprinkle some icing sugar and serve!


Fudge Icing


3 dl cream
1 dl milk
1 dl light syrup
1 ts ginger, ground
400 g dark chocolate, finely chopped


1. Let the cream, milk, syrup and ginger come to boil and remove from heat
2. Add the finely chopped chocolate in the hot mixture and stir till the chocolate melts in
3. Spread the icing on the brownies cake and garnish with some walnuts


Let the brownies cool in the fridge


Blondies..


.. and Chocolate Chip Walnut Brownies served with ice cream and chocolate sauce

4 Aug 2011

Stuffed Chicken Horns (Buns)


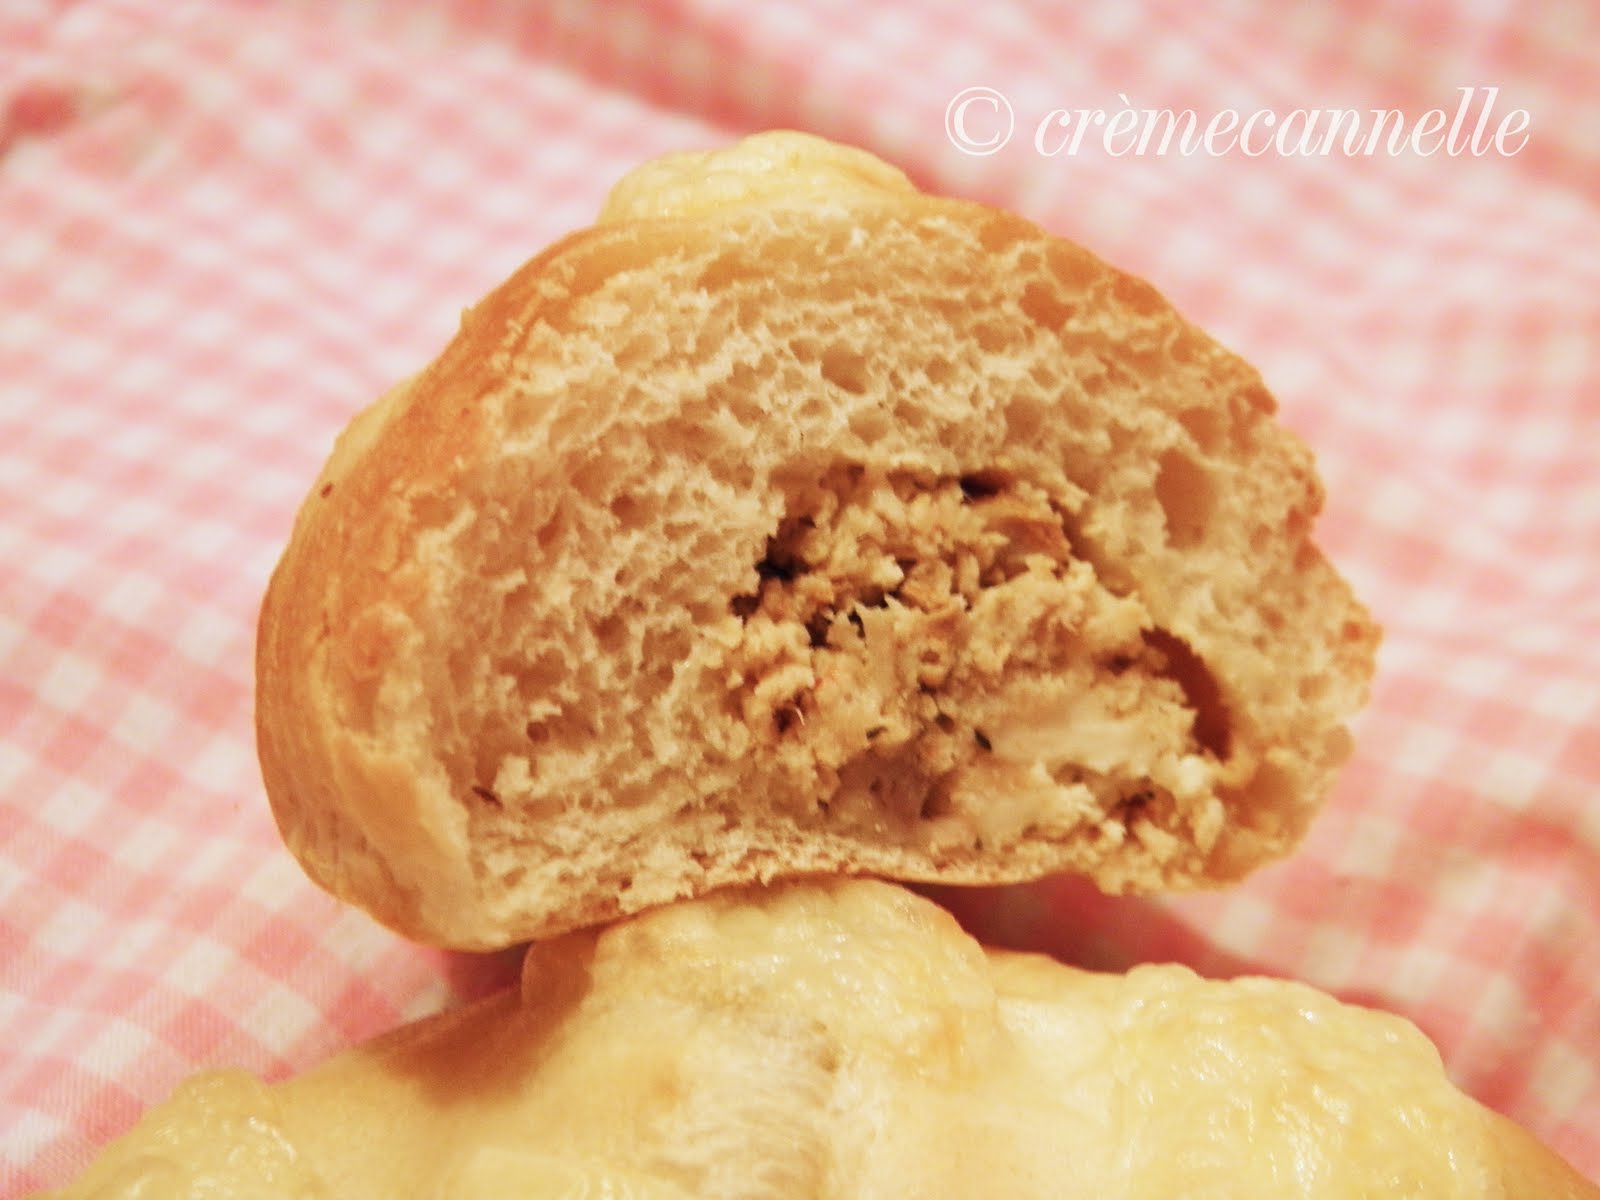
Today, I am tempting you with some freshly oven hot horns (buns) filled with chicken and feta cheese. The savory feta taste goes well with chicken and these light buns are perfect as dinner sides or evening snacks along with some garlic sauce and ketchup.


Makes 12 large - 16 small horns (buns)


I n g r e d i e n t s


30 g yeast, fresh
30 g butter
250 ml milk
1 tbsp sugar
1/2 tsp salt
1 egg (optional)
400 g (ca) flour


grated cheese, poppy seeds, sesame seeds


1. Melt the butter, add milk and warm up to about 37C


2. Take some of the milk mixture in a small bowl and add yeast, whisk until blended and add it back in the rest of milk mixture


3. Add sugar, salt, egg (optional, but will give a softer texture) and a cup of flour


4. Add almost all of the remaining flour (but keep a handful for rolling out later) and knead until you get a smooth dough (about 7-10 minutes by hand)


5. Transfer the dough to a clean bowl, sprinkle a little flour on the top and let raise for about 30 - 45 minutes, or until double in size


After the raising


6. Divide the dough in two parts and roll out each dough till you get a flat round which resembles a pizza bun

7. Divide the round in 6 or 8 pizza slices and add a spoonful of filling (see recipe below) on each

8. Roll each slice from the wide side all the way around pressing the dough so the filling will keep inside so it forms a horn, bend so that they form a half cirle (or you can roll buns the way you like)


9. Have the horns (buns) on greased baking trays or with baking paper, cover and let raise for another 30 - 45 minutes or until double in size


10. Brush with lightly beaten egg or milk and garnish with cheese, poppy seeds or sesame seeds

Bake in the middle of a hot oven at 200C for about 10 minutes or until golden in color


Keep them covered in a kitchen towel to keep them soft


Chicken Filling


200 g chicken, boiled or dinner left-overs *
50 g feta cheese


or


other filling of choice


* Just tear left-over chicken in small bites


1. Combine chicken and feta cheese until mixed


These buns are called "horns" because of their traditionally way of rolling, their shape that resembles a horn. But you can roll them in any shape you want


3 Aug 2011

French Strawberry Fraisier - The Daring Baker's Challenge, July 2011


A Strawberry Fraisier can be described as the perfect harmony of colors and taste. Imagine the bright red strawberries melting into offwhite Crème Mousseline meeting ivory feathery cake bottoms where the dark brown chocolate drops off the last artistic touch. So simple. So elegant. So French!


Last months Daring Baker's Challenge was an quite interesting one. It was a whole new experience to me and I was really excited to see if I could achieve good result as it was my first try on a fraisier ever. To be honest, I could not recall to have really heard about this type of cake before. So having similarities to the marzipan cakes I often bakes, it inspired me to decorate cakes in a another way than the typical one I am used to. I could not think of a cream cake with marzipan decorated this way. One word, it was gorgeously beautiful. I really fell in love with the lovely red strawberries cut in half all around the cake and the marzipan lid on top which was so easily and simply decorated yet giving it a magical elegant look.


I have to admit I cheated a little. Well not really, but I decided to use another recipe for the fraisier cake bottom which I found here, a Meyer Lemon Génoise Cake.
For rest of the cake, I followed the recipes given by the daringkitchen.


For the Basic Chiffon Cake recipe by thedaringkitchen, please check here at Berry Lovely's blog.


I n g r e d i e n t s

Meyer Lemon Génoise Cake


125 g cake flour *
25 g butter, melted
4 eggs, at room temperature
130 g sugar
(3 tbsp Meyer lemon zest (from 2 - 3 lemons), optional


* If you do not have cake flour available, you can easily make your own by adding 2 tbsp of cornstarch to 1 cup allpurpose flour, taking out 2 tbsp of flour: 110 g flour + 15 g (2 tbsp) cornstarch = 125 g cake flour)


Preheat oven to 175ºC / 350ºF and lightly grease the bottom of a 22-24 cm / 9-inch cake pan


1. Sift the cake flour and set aside
2. Melt the butter and set aside.
3. Heat the eggs and sugar over a double boiler with simmering water. Whisk constantly until the mixture reaches 122ºF (50ºC), about 7 minutes. Once the mixture is heated beat the mixture to ribbons, preferably using a stand mixer. (You can use a handheld mixer or whisk by hand, but it will take a lot longer). The mixture is at the “ribbon stage” when you pull the batter up with the beater and it stays atop the rest of the mixture, forming a ribbon-like effect. It will take about 8 minutes for the mixture to reach this stage using a stand mixer, about double the time using a handheld
4. Fold 1/4 of the egg mixture into the melted butter to lighten the butter. Add the lemon zest to the egg/butter mixture. Fold the egg/butter mixture back into the rest of the egg mixture.
5. Sift 1/3 of the cake flour onto the egg mixture, then gently but quickly fold together. Repeat in thirds until the flour has been incorporated.
6. Gently pour the batter into the cake pan


Bake at 175ºC / 350ºF for about 17 minutes, or until you insert a knife in the center, and it comes out with a few moist flakes of cake


Remove from the oven and let cool for 10 minutes, then remove from the cake pan. Let cool completely. (If a mound has formed on the top of the cake, slice it off to make an even and flat top.) Slice the cake into two halves.


Pastry Cream Filling


250 ml whole milk
1/2 tsp pure vanilla extract
1/8 tsp salt
2 tbsp cornstarch
55 g sugar
1 egg, large
30 g butter
3/4 tsp gelatin, powdered
1/2 tbsp water
250 ml heavy cream


1. Pour the milk, vanilla, and salt into a heavy sauce pan. Place over medium-high heat and scald, bringing it to a near boiling point. Stir occasionally
2. Meanwhile, in a stand mixer add the cornstarch and sugar. Whisk to combine
3. Add the eggs to the sugar and cornstarch and whisk until smooth
4. When the milk is ready, gently and slowly while the stand mixer is whisking, pour the heated milk down the side of the bowl into the egg mixture
5. Pour the mixture back into the warm pot and continue to cook over a medium heat until the custard is thick, just about to boil and coats the back of a spoon
6. Remove from heat and pass through a fine mesh sieve into a large mixing bowl. Allow to cool for ten minutes stirring occasionally
7. Cut the butter into four pieces and whisk into the pastry cream a piece at a time until smooth
8. Cover the cream with plastic wrap, pressing the plastic wrap onto the top of the cream to prevent a skin from forming. Chill in the refrigerator for up to five days
9. In a small dish, sprinkle the gelatin over the water and let stand for a few minutes to soften
10. Put two inches (55 mm) of water into a small sauce pan and bring to a simmer over a medium heat
11. Measure 60 ml of the chilled pastry cream into a small stainless steel bowl that will sit across the sauce pan with the simmering water, without touching the water
12. Heat the cream until it is 120 F (48.8 C). Add the gelatin and whisk until smooth. Remove from the water bath, and whisk the remaining cold pastry cream in to incorporate in two batches
13. In a stand mixer, fitted with the whisk attachment, whip the cream until it holds medium-stiff peaks. Immediately fold the whipped cream into the pastry cream with a rubber spatula


Simple Syrup


You may choose to flavor the syrup. One way is to use flavored sugar (for example: apple cider sugar, orange sugar, or vanilla sugar) or to stir in 1-2 teaspoons of flavored extract. You may also infuse with herbs or spices, if desired or add four tablespoons (60 ml) of fruit juice or liqueur while the syrup is cooling.


75 g sugar, flavored or white
80 ml water


1. Combine the water and sugar in a medium saucepan
2. Bring the mixture to a boil and let the sugar dissolve. Stirring is not necessary, but will not harm the syrup
3. Remove the syrup from the heat and cool slightly
4. Transfer syrup to a lidded container or jar that can be stored in the refrigerator (Simple syrup can be stored for up to one month)


Fraisier Assembly


Components:


1 baked 9 inch (22-24 cm) chiffon cake / genoise cake
1 recipe pastry cream filling
80 ml simple syrup or flavored syrup
900 g strawberries
confectioners’ sugar for dusting
140 g almond paste / marzipan


1. Line the sides of a 9-inch (22-24 cm) spring form pan with plastic wrap. Do not line the bottom of the pan
2. Cut the cake in half horizontally to form two layers
3. Fit the bottom layer into the prepared spring form pan. Moisten the layer evenly with the simple syrup. When the cake has absorbed enough syrup to resemble a squishy sponge, you have enough
4. Hull and slice in half enough strawberries to arrange around the sides of the cake pan. Place the cut side of the strawberry against the sides of the pan, point side up forming a ring
5. Pipe cream in-between strawberries and a thin layer across the top of the cake
6. Hull and quarter your remaining strawberries and place them in the middle of the cake. Cover the strawberries and entirely with the all but 1 tbsp. (15 ml) of the pastry cream
7. Place the second cake layer on top and moisten with the simple syrup
8. Lightly dust a work surface with confectioners' sugar and roll out the almond paste to a 10-inch (25 cm) round 1/16 inch (1,5 mm) thick
9. Spread the remaining 1 tablespoon (15 ml) of pastry cream on the top of the cake and cover with the round of almond paste (garnish as desired or keep it simple)
10. Cover with plastic wrap and refrigerate for at least 4 hours


To serve release the sides of the spring form pan and peel away the plastic wrap
(Serve immediately or store in the refrigerator for up to 3 days)


I made this cake on the sixteenth birthday for my younger brother who had birthday in the mid of july. I made a swirl border with melted dark chocolate all around the cake (could have done it finer, but the pastry bag was not really the best one) and garnished with fersh strawberries and cherry, glaced with some clear syrup and chocolate curls.


Did you know that "Fraisier" actually means "strawberry" in french? A Strawberry Fraisier would actually stand for "Strawberry Strawberry"!


Bon appétit!

2 Aug 2011

Katayef - Arabic Filled Pancakes


Katayef or qatayef is an arabic dessert which consists of small pancakes filled with milk cream and nuts, poured with hot syrup. These small dumplings are really delicious and cute mouthfuls.


Qatayef is the general name of the dessert as a whole, but more specifically, the batter. The result of the batter being poured into a round hot plate appears similar to pancakes, except only one side is cooked, then folded. The pastry is filled with either unsalted cheese or a mixture of any of hazelnuts, walnuts, almonds, pistachios, raisins, powdered sugar, vanilla extract, and cinnamon. It is then deep-fried or, less commonly, baked and served with a hot syrup or sometimes honey (Wikipedia).

This version which I have made is filled with milk custard cream and garnished with pistachio nuts. 


The katayefs are made in three steps:


1. Pancakes
2. Cream filling
3. Syrup


Start with the pancake batter as it has to rest for about 40-45 minutes.

I n g r e d i e n t s


Katayef Pancakes


2,4 dl allpurpose flour
0,3 dl wheat flour
3/4 tsp yeast, dry
3/4 tsp sugar
1,8 dl milk, fat-free luke warm (or 0,9 dl fat milk combined with 0,9 dl warm water)
1,8 dl water, warm


1. Combine all the ingredients in a medium sized bowl and mix with an el-mixer for a few seconds until well combined


2. Let rest covered with a tray for about 40 minutes or until it thickens


After the resting

3. Heat a medium or large sized pan (or you can use a pan for small pancakes with small holes) over medium heat (no need of buttering the pan, just use a teflon non-stick pan)
4. Pour the batter, about 1 and 1/2 tbsp using a scoop from a high distance so it can even out easily
5. Let cook on one side only until it forms small bubbles all over and gets completely dry and golden brown at the bottom
6. Remove from the pan and put on top of eachother between two tissues to keep them soft


If you have some left-over batter, add a handful of sugar and cook som large sized sweet pancakes. Scoop the batter on a warm pan and make circles with the scoop, round and round, quickly to even out the batter. Let cook a few minutes on one side only (keep them covered with some foil, they may seem hard when you get them off the pan, but they will soften after a few minutes). Serve plain or with some honey


While the batter is resting, prepare the milk filling


Milk Custard Filling


2,4 dl milk
3 tbsp cornstarch
0,5 dl sugar
1 tsp vanilla essens / powder
1/2 tbsp rose water / other flavoring


1. Add milk, cornstarch and sugar in a medium sized saucepan and stir over medim-high heat until it thickens


2. Stirring continiously add the vanilla and flavoring, stir until it becomes really thick (be careful since it can burn easily on the bottom)


3. Sieve it in a bowl and keep in refrigerator to cool


Garnish


20 g pistachio nuts, unsalted


1. Chop the pistachio nuts very fine


Syrup


0,5 dl sugar
0,5 dl water
1/2 tbsp lemon juice
1/4 tbsp rose water / other flavoring1/2 tsp cinnamon, ground


1. Add sugar and water in a medium saucepan, let the sugar dissolve and come to a boil
2. Add flavorings and cinnamon, let cool for a few minutes


Making the katayefs

1. Fold each small pancake half and press half-way up, so it resembles a tuile or cone (see picture in the recipe of cooking the pancakes)
2. Put one to one and a half teaspoon of milk custard filling in each pancake
3. Have the finely chopped pistachio in a bowl and lightly press each filled pancake in the pistachio nuts so that they will stick to the custard


4. Have them nicely on a plate and pour semi-warm syrup on the filled pancakes using a spoon5. Serve warm or cool (keep in fridge)


1 Aug 2011

Fruit Cream Salad


The simple is often the best. That phrase is so true, and applies well to this creamy dreamy fruit salad which is so simple yet so delioucious. Hot summer days requires something easy, light, cool and fresh and I tell you, you would not come closer to these keywords than this fruit cream salad.


All you need is a bowl of your favorite fruit cut in cubes, a little whipping cream and a handful of sugar. The mango and pomegranate adds an exotic flavor to this salad which makes the flavors unique.


I n g r e d i e n t s


2 bananas, ripe
1 apple
1 pear
1 nectarine/peach
1 mango
1/2 pomegranate
1 grapes green, bunch of


2,5 - 3 dl cream
0,5 dl sugar


Cut the fruit in cubes and combine


Whip the cream and add sugar


1. Cut the fruit in small cubes and mix in a large bowl
2. Whip the cream until soft peaks forms, add the sugar and combine together
3. Add the cream in fruit bowl and mix until all fruit is covered with cream
4. TRansfer into a clean bowl
5. Chill in refrigerator until served


This must be the favorite dessert at home, it's gone with the wind everytime! Garnish with some walnuts and pomegranates for a beautiful finish.