16 Nov 2011

Chocolate Chip & Walnut Cookies


Chocolate chip chunks and crunchy walnuts in each bite.. these american cookies are a delicious treat to your sweet cravings with milk, ice cream, tea or coffee. Or just enjoy them as they are.

Chocolate chip cookies.. yum! Freshly baked and hot from the oven.. can it be better?? Feel the lovely smell spreading throughout the home. It is amazing. And there are few things that can compare with a glass of cold milk and chocolate cookies.

This chocolate chip & walnut cookies recipe is from my favorite blog, Passion4baking and I just had to try these out when she posted them up. These cookies have their origin from America and Manuela got the recipe from her friend's mother in 1987. Hmm, a coincidence.. I was born the same year.


The cookies turned out really good and delicious with yummy chocolate chunks and walnuts in each bite. You can have these alone, with coffee or milk, and they make good company to some vanilla ice cream. I topped mine cookie with some caramel sauce and chocolate topping to make it even more chocolicious!

Scroll down for step-by-step pictures and recipe!


Makes about 15 - 20 cookies


I n g r e d i e n t s

150 g butter, at room temperature
100 g sugar
115 g brown sugar
1 tsp vanilla extract or powder

1 egg, large at room temperature
200 g allpurpose flour
1 tsp baking soda
0,5 salt
100 g chocolate, chopped
50 g walnuts


1. Combine butter, sugar, brown sugar and vanilla extract/powder together in a large bowl


2. Add butter and beat together until it becomes pale in color and fluffy (about 5 minutes)


3. Add the egg and beat until well combined (about 1 minute)


4. Combine flour, baking soda and salt in another bowl and add in the mixture


5. Mix in chopped chocolate and chopped walnuts


6. Like this..


7. Scoop out (using ice cream scooper or use a spoon) the batter


8. Drop even sized batter on a baking tray with parchment paper keeping distance between each


Beautifully scooped out.. just like ice cream


I do about 12 a tray..


Bake in the middle of a a pre-heated oven at 160 C for about 10 - 12 minutes or until they are golden in color

Freshly baked chocolate chip & walnut cookie right out from the oven.. lovely!


Mmmm, tempted?


Want a bite?

14 Nov 2011

Chocolate Heart Birthday Cake with Buttercream


Simple and cute chocolate heart cake covered with buttercream and garnish in lovely pinkish colors that fits well in a little girls dream party.


This heart shaped cake with pink and purple smarties was my cute and lovely niece's 5th birthday cake which I made for her. Actually I had a lot of ideas of making a wonderful dream-come-true girls imaginary fantasy cake with a lot of pinks and something like a barbie-in-the-middle cake or a princess cake. My niece loves being a princess, she dresses up in cute pink dresses and she really wanted a princess themed cake. But her mom told me to not make a whole lot of the cake, "just make something simple" she said, because small girlies at the birthday party waste alot and a simple chocolate cake would do well. I was fine with her wish, but wanted to give my niece the pinks she loves and a cute look to the cake that would look childish and girlish and a little princess-like.


So I ended up making a chocolate cake with a heart shape (she got a thing for hearts <3) and covered it all with buttercream (which I assumed kids would love) and some smarties in girly colors. The idea stroke to me later on (but it was too late) that I could have put a cute little ponny or doll on top of the cake to makeit even more fantastic. However, the chocolate cake turned out good and was well appreciated by my family which finished the remaining cake at the evening family party for my niece.


Serves about 10 - 12

I n g r e d i e n t s

1 spring form heart shaped about 22 - 24 cm

Chocolate cake

1 recipe chocolate cake recipe, doubled quantity (click for recipe and step-by-step photos)

Buttercream frosting

100 g butter
175 g icing sugar
1 tsp vanilla sugar
0,25 tbsp milk

pink coloring


smarties in pinkish colors
white heart sprinkles
white pearls


1. Cream the butter until it becomes creamy and smooth
2. Sift in icing sugar, little by little while you mix well between each time until it becomes really pale (almost white) in color and smooth
3. Add vanilla sugar and a little milk to get a smoother icing
4. Keep aside about 1/5 part of the icing in another bowl and add som pink coloring to get a very light pink color
5. Spread the white buttercream icing evenly on all the sides of the cake
6. Spread the pink buttercream on top of the cake and pipe swirls all around following the heart shape with white icing using a medium star tip
7. Likewise pipe all around the bottom also to give a nice finish (small flat-tagged tip)
8. With the remaining white buttercream pipe branches all around on the sides and dot with pink butter cream to give them a flowery look and some white pearls
9. I used pink and purple smarties on the top to give it a more childish and cute look
10. Complete the cake with some heart sprinkles and pipe in desired message or leave it plain - you can also put a cute ponny in purple or pink or a small doll on top of the cake

Love you, my cute little nieces <3


13 Nov 2011

Troika Chocolate Cupcakes with Chocolate Mousse


Layers of chocolatey, berry, creamy, almondy and silky smooth components. Troika chocolate cups are a fusion of dark and light flavors, hard and smooth texture.


I love chocolatey treats. And chocolatey desserts can never fail to me. I do not really make dessert often, it usually goes in baking and the reason of that is perhaps that we never have had any tradition of serving dessert after a meal at home. Okay, maybe special occassions, but then we mostly goes for a creamy fruit salad or custard or trifle.
So on this special occassion I wanted to go for something different and very chocolatey (not everyone at home are fan of chocolate - like seriously - I know it is hard to believe!). I had planned for long to make a dessert which could be served in a edible container, my idea was more of a cupcake form of chocolate filled with chocolate mousse or anything alike. So what I had available was two large bars of dark chocolate, marzipan, nougat, strawberry jelly and fresh cream and I wanted to make a dessert with all the components that goes in a Troika bar (a norwegian chocolate filled with layers of nougat, raspberry jelly, marzipan and chocolate truffle). Here is a recipe for Troika cake and more information about the Troika bar.


I started with making the edible chocolate cupcake forms by painting melted chocolate inside the cupcake forms. I had to coat them for twice and some even thrice to achieve a thick coating which would make the chocolate form stable and not break easily. The next day, I made instant jelly and filled 1/3 part of the chocolate forms, a little nougat, grated marzipan and finished it off with a good amount of chocolate mousse.


The Troika chocolate cupcakes turned out delicious and should quench the thirst of every chocoholicer. The combination was amazing, but I had a few errors. Like the jelly did not get fast enough (maybe I added too much water) and the chocolate mousse should have rested overnight, but since I made it the same morning it was going to be served the texture and flavors was not set completely.
So having these the next day was a delight for my and others chocolatey palate.


Makes about 12 Troika Cups

Chocolate Cups

200 g dark chocolate (good quality)

1. Melt the chocolate (it is advisable to temper the chocolate for a shiny finish) and coat the cupcake forms completely covering inside
2. Let set in the freezer for a few minutes and apply a second coat of chocolate
3. Let set in the freezer again and apply a last coat so that it will get solid (otherwise it can break easily)
4. Set in the freezer again, let rest in room temperature for a few minutes and then carefully peel the cupcake forms so that you will have beautiful edible chocolate cupcake forms

Filling

1/2 packet (40 g powdered) raspberry or strawberry instant jelly
50 g nougat
75 g marzipan, grated

Chocolate Mousse (Makes more than enough)

125 g dark chocolate of good quality
1,5 dl whipping cream
1 egg yolk
1 egg white
1,5 tbsp sugar

1. In a clean bowl whip the egg white until it form stiff peaks
2. Whisk the egg yolk along with sugar until it becomes pale in color and creamy (egg nog)
3. Melt the chocolate over hot water bath with one tablespoon of cream
4. Whip the cream until it starts to form peaks and fold in the melted chocolate, egg nog and lastly the egg whites (a even creamy mass)

Let cool in the refrigator preferably overnight

Assembling

1. Keep the chocolate cups on a tray in the freezer and make jelly following the instruction of the packet, wait till the jelly gets luke warm and pour carefully in the chocolate cups while they are still in the freezer. Let the jelly set keeping them in the freezer and transfer them to the refrigerator later


2. Have a spoonful of nougat in each chocolate cup on top of the jelly


3. Cover with some grated marzipan


4. Finally pipe or spoon the chilled chocolate mousse on top


Garnish with some blanched and chopped almonds and chocolate decorations, serve with some strained raspberry jam!

<3 Deux ans et demi - de doux souvernirs avec des friandises sucrées <3


9 Nov 2011

Lemon Tartlets


Creamy sweet lemon curd with a lovely fresh lemon flavor filled in crunchy tartlet shells. Simple and deliciously good!


I have never found lemon tartlets appealing when it comes to baked goodies. And I think the reason may be the "lemon" itself, more than the "tartlet". When I was younger my mom used to buy these double sandwiched square cookies that comes in a long packet with a good quantity of biscuits with lemon flavor. And that lemon flavor in those biscuits did not have a chance to be added in my favorite list. Later on I have baked lemon cake which has been pretty good with a slight lemon flavor, but I have still not managed to see how lemon or more specifically lemon curd alone can be good in a tart shell. Until recently.


The first time I had a bite of a lemon tartlet was last year on a vacation abroad. It was not the best, but surprisingly alright in taste yet still not good enough to be remembered. And after that I never had a second try on lemon tartlet before just a few days ago and this time I was the pastry chef myself.
The matter here in this case is that my brother-in-law loves lemon tartlets. He has been eating them in restaurants, bakery's and stuff and has definitely found his favorite. So my challenge was to create "perfect" lemon tartlets and all the experience I had regarding lemon tarts was the bite I had a year ago.


Anyways, I had not only to take the challenge, but win it also and my research for lemon tartlets started on google. It is never easy to find recipe in google, because you do not have a clue which one is good and which one is not so I tried to read some blogs and make an idea of what a good recipe could be like. The problem was not the tart shell crust, it was the lemon curd. My sister told me she tried to make lemon tartlets once and ended up with too intense lemon flavor which ruined the tartlets and almost all of the recipes I checked had a large quantity of lemon juice added. Do not the lemons outside scandinavia have a strong flavor??


All the google searching made me even more confused so I just picked up the recipe that made sense to me and went off trying it. Even this recipe called for a whole half a cup of lemon juice and I reduced it till barely 1 tbsp which according to me also was too much and gave a strong enough flavor. For the tartlet shells I used a recipe from an old norwegian cooking book.


Ok, so did I win this challenge of making the "perfect" lemon tartlets? Uhm, well not really, but I can say I was pretty close. A few adjustments and I could have got greater results. The judge himself (my bro-in-law) could sum it up with that it was a good effort, but the lemon curd had to be thicker and the yellowish color was too strong (I added coloring since swedish eggs are too pale). My mom thought it had a strong buttery flavor (which is true cause of all the butter I added).

So what do I think? Firstly, I think it was a good attempt, secondly lemon tartlets are not at all bad. They tasted lovely with a fresh lemon tast, but yes, less butter could make them even tastier. And I wanted to pipe the lemon curd like a swirl so the curd has to be thicker next time. I will try to make them again at the end of this week with another lemon curd recipe that is made with maizena and very little butter. I guess this will thickens the curd and hopefully give "perfect" lemon tartlets.


Makes about 12 lemon tartlets


I n g r e d i e n t s


Tartlet Shells

12 - 14 tartlet shells

100 g butter
100 g allpurpose flour
1 tbsp water, ice cold

Grease the tartlet shells with butter

1. Dice the butter into cubes and have the flour in a medium sized bowl
2. Crumble the butter into the flour with your fingertips
3. Bind the dough together with the water (do not over-work the dough), wrap it in plastic foil and chill in the refrigerator for atleast 1 hour or preferably overnight

4. Roll out the dough and cut circles that are a little larger than the tartlet shells. Cover the shells and prick with a fork and fill them with beans (to avoid shrinking of the tarts wile baking)

Bake in the middle of a hot pre-heated oven at 200C for about 15 minutes or until they are golden in color


Lemon Curd (taken from Ono Kine Grindz and modified a little by me)

2 eggs
2 egg yolks
2 dl sugar
1 tbsp lemon juice, freshly pressed
75 g butter

1. Combine eggs, egg yolks and sugar in a bowl and whisk until well blended
2. Add the lemon juice and continue to whisk until the sugar has dissolved
3. Transfer the egg mixture to a sauce pan, add in butter and cook on medium-low heat until it thickens (about 10 minutes). Do NOT allow it to boil
4. Pour in a bowl and let cool completely at room temperature

Fill the lemon curd in the baked tartlet shells and bake them again in a moderately hot oven at 125C for about 5 minutes to set the lemon curd

Let cool completely at room temperature and store in a airtight container


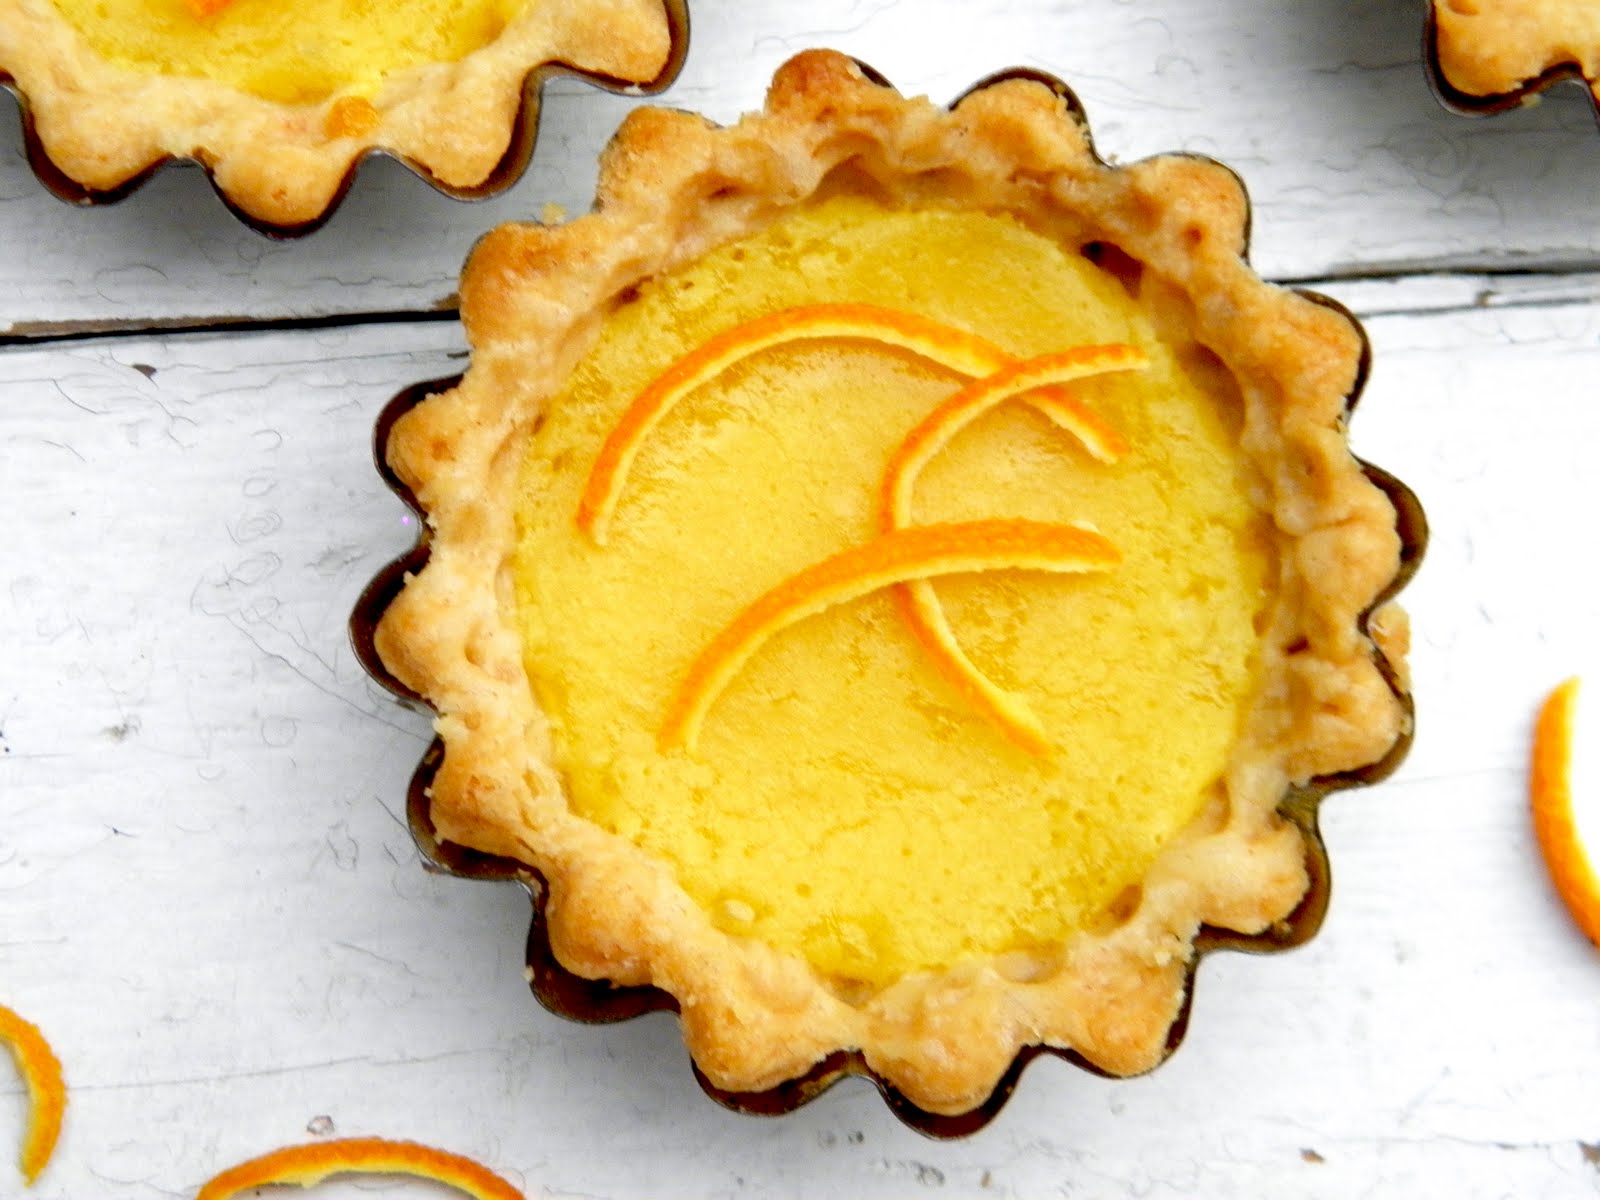
Beautiful lemon tartlets..


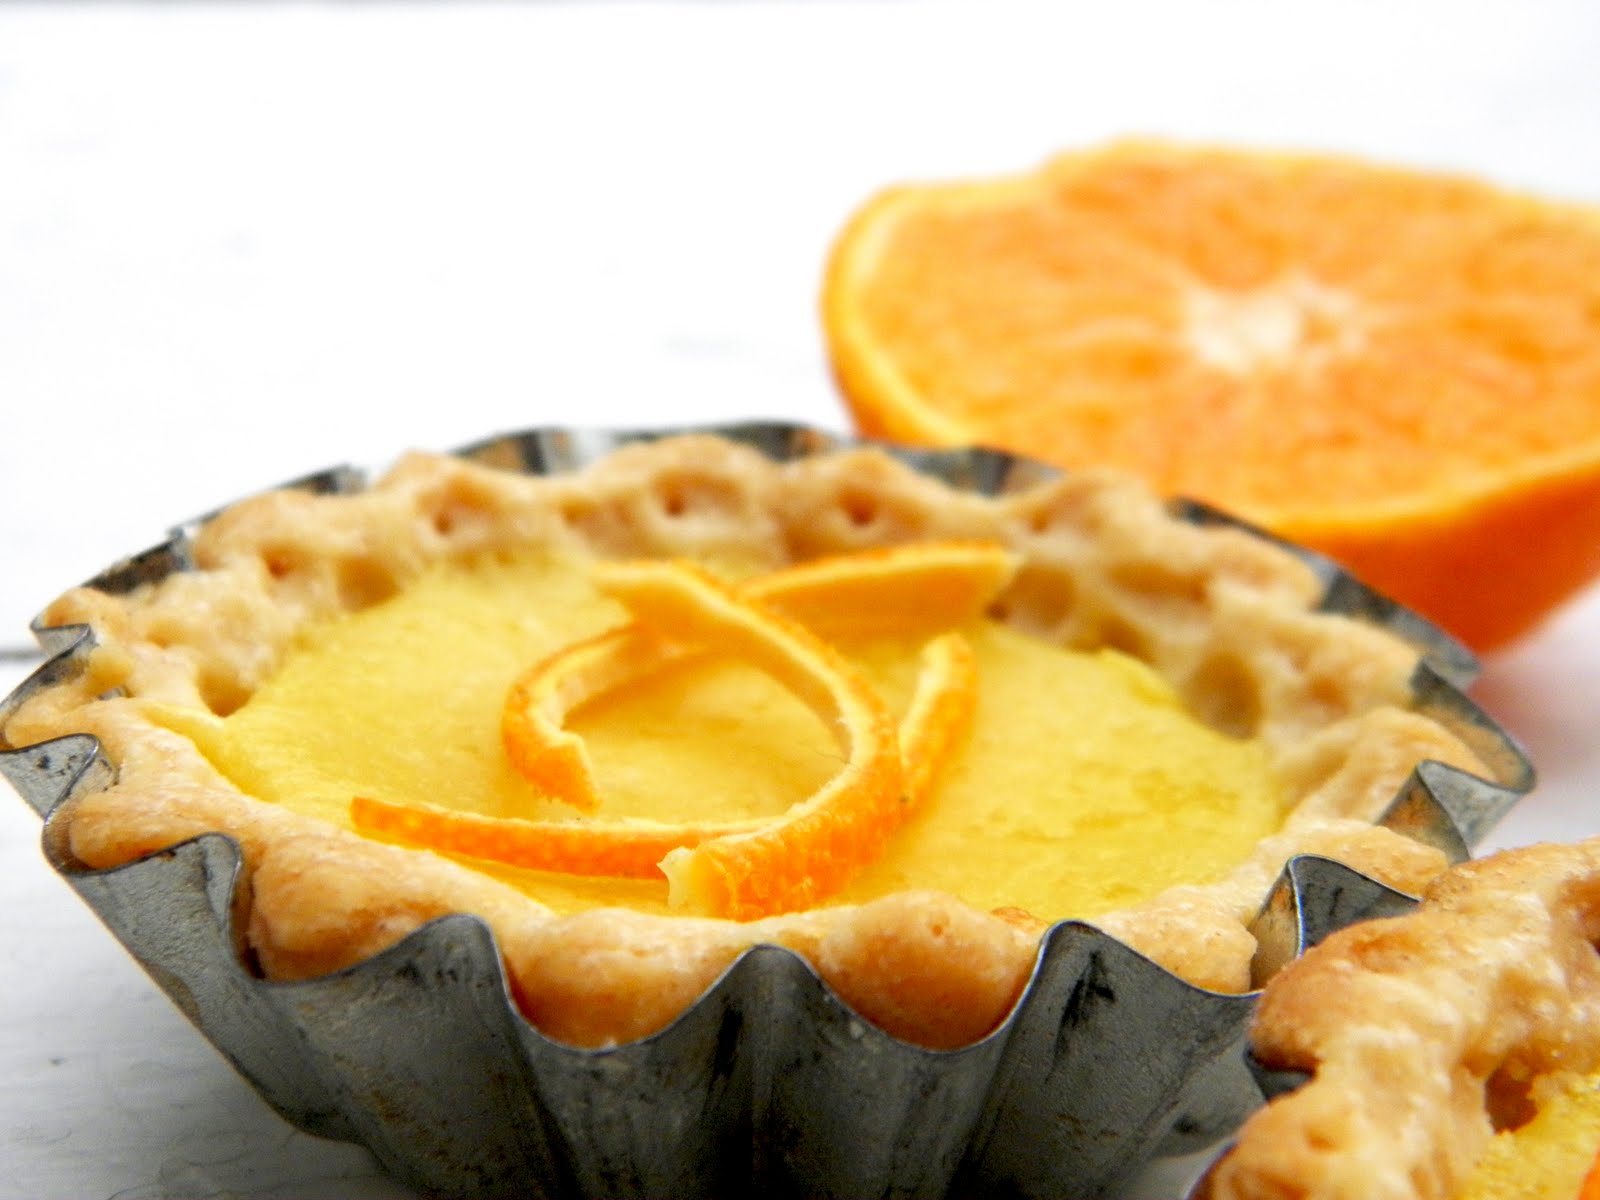
garnished with peel of clementine


I had to take pictures with a half cut clementine since I had no lemon


19 Sept 2011

A White Fondant Cake for Special Occassion


A sponge cake filled with cream and jam covered with marshmellow fondant and decorated with roses, pearls and ribbon for occassions like weddings, anniversaries, birthdays, holidays or other special celebrations which requires an elegant looking cake.


For the very special occassion at the end of august, a special cake was a must. And as the self-appointed cake deliver at all the occassions, I could not disappoint anyone this time either. Due to a lot of confusion I thought I was not supposed to make any cake this time as we were going over to someone, but things got cancelled without prior notice and I had no time for an instant cake baking. However, I had to change my mind after hearing "would not it be any cake for tomorrow?", "so boring without a cake" and etc. I mean who would not? A lot of people to please, and perhaps the cake was like a highlight of the occassion.


I spent the night before making chocolate heart bonbons and this night was dedicated to cake baking and french macaroons. Around 12 am midnight I prepared the cake sponge, filled it with jam, cream and covered it with marzipan. I had doubts if I could manage to decorate it properly the next day, as I the schedule was so tight. Fortunately I managed it in no time. I was pretty much satisfied with the result, even though I had planned to make it a two-tiered cake decorated with royal icing at the very beginning.

Cakes with soft and delicate colors attracts me and especially white toned ones. I just love them. There is something pure and elegant about this color which makes everything look more decent and beautiful. 


A pink ribbon all around and pearls to give the cake some color and beauty.
This is a simple sponge cake filled with jam and cream, topped with marzipan and decorated with marshmellow fondant. (Marshmellow fondant is thousand times better in taste and texture than rolled fondant which only taste sugar and is too stiff. In addition, it is much more pliable and easier to work with. My rolled fondant last time was just breaking apart and was difficult to cover and get smooth).


No step-by-step pictures (remember it was midnight!) this time.


Sponge Cake

3 eggs, at room temperature
120 g sugar
120 g allpurpose flour
1 tsp baking powder


Follow instructions here (Basic Sponge Cake recipe)


Jam Filling

1 dl strawberry or raspberry jam
(or choose any flavor according to taste)

Cream Filling

4 dl cream

0,75 dl vanilla cream, instant
1 tbsp icing sugar


1. Prepare the vanilla cream according to packets instructions (keep it a little stiff)
2. Whip the cream until it forms stiff peaks
3. Keep aside about 1/4 part of the whipped cream for later use
4. Fold in the vanilla cream in the remaining whipped cream

Marzipan


300 g marzipan or almond paste

Marshmellow Fondant 

(Covers a 22 cm / 9 inch) cake and enough to make about 10 roses and a drape)


150 g marshmellows
1,5 tbsp water
1 tbsp coconutfat / vegetable fat
ca. 375 g icing sugar


1. Have the marshmellows and water in a large bowl and warm it up in the micorwave on full temperature for about 1,5 - 2 minutes till they starts to puff up.
2. Add the fat (and color if you wish to) and stir until well combined using a wooden spoon
3. Add the icing sugar, little by little and stir well
4. When it starts to form a dough, turn out on a surface and knead in rest of the icing sugar until it forms a smooth ball
5. Wrap in a plastic wrap and keep in fridge (can keep long in fridge, just knead it before use to soften it up)
6. Use flour when you work with the fondant


In addition you will need

0,5 dl apricot or orange jam
1-2 tsp water
edible pearls
ribbon
icing sugar


Assembling the Cake

1. Divide the cake in three bottoms and have the first one on a serving plate
2. Soak the bottom with milk (sprinkle)
3. Spread the jam followed by the cream filling
4. Cover with a second bottom and repeat
5. Cover with the last bottom, spread jam and cover all around with the remaining (1/4 part) whipped cream
6. Roll the marzipan to the size of the cake plus the height and cover the cake trimming the edges
7. Warm a little apricot or orange jam in a saucepan along with a teaspoon of water until it just gets warm, brush all over the marzipan
8. Roll the marshmellow fondant the same way as the marzipan and cover the cake, smooth it out and trim the edges
9. Decorate with fondant roses, pearls and ribbon as desired

For the roses, please see tutorial here, I might post my tutorial some other time (the roses and pearls were glued on with icing sugar combined with water to a medium thick paste)


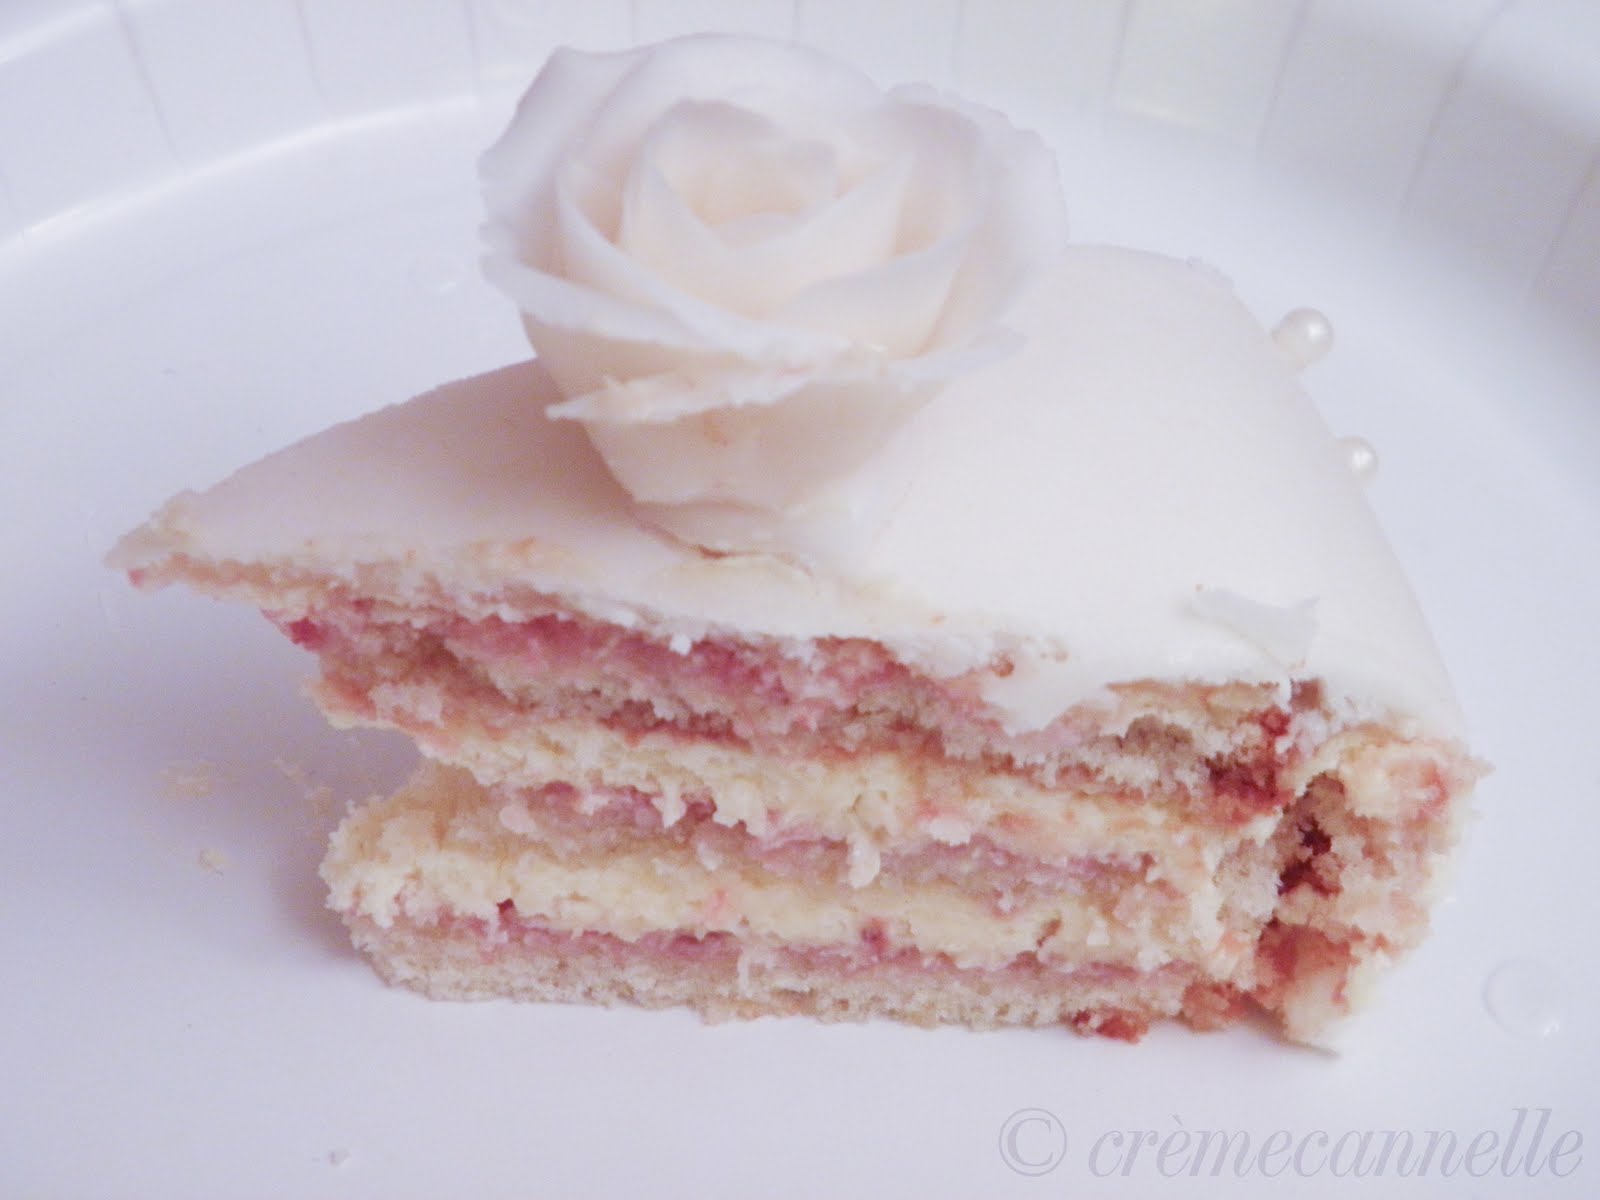
Fondant rose..


and a piece of the cake..

14 Sept 2011

The Hummingbird Bakery - Brownie Cheesecake with Raspberry Mousse


Creamy, dreamy and silky smooth. A trio of the best cakes emerged in one - melting in your mouth. These words gives justice to describe this brownie cheesecake with raspberry mousse topping.


I was so happy to see a new baking book at the library (they rarely buys new books in this category, really) for a while ago and borrowed it right away. The hummingbird bakery cookbook had a lot of great recipes, but I have to say I was a bit disappointed of the images in the book. Not that they were not good, but I did not find them really appealing and up-to-date. I was expecting more by a professional bakery cookbook. Anyways, one of the recipes that caught my attention was this brownie cheesecake with raspberry cream. I decided to try this recipe (and I think it was the only recipe that really appealed to me - the cupcake recipes had a strange procedure of mixing everything together and did not really convince me) from the first time I saw it, and now finally I completed it last weekend. 


Did the recipe disappoint? No, not at all. But it was obvious, for how could brownies and cheesecake and raspberry mousse go wrong together if they tastes amazing seperate as I told my sister when she started to become skeptical (well now that is typical her). But using my own brownies recipe made it go a little wrong. The cheesecake was baked fine, but the brownies was still like a runny fondant on the sides after being in the oven for over 40 minutes. And that made me realize that I should have used the brownies recipe of the hummningbird bakery as it was made with chocolate while mine was not. And perhaps the consistency of the brownies needed chocolate to be able to hold the cheesecake batter and bake evenly along with it. Yea yea, a small bagatelle which did not affect the taste at all and I will remember to use the proper recipe next time. 


I love brownies, I love cheesecake and I love cream. And I would not say no to these goodies coming as 3-in-1. I hope to get the brownies right next time (I actually took step-by-step pictures of the brownies procedure, but as the recipe did not work out, I am not posting them. Try this brownie recipe and tell how your results turns out). This is a great recipe which I recommend highly. 


Makes about 24 pieces


Brownies


200g dark chocolate, roughly chopped
200g unsalted butter
250g icing sugar
3 eggs
110g plain flour


Preheat the oven to 170°C / 325°F Gas 3


1. Put the chocolate in a heatproof bowl over a pan of simmering water (do not let the base of the bowl touch the water). Leave until melted and smooth.
2. Put the butter and sugar in a freestanding electric mixer with a paddle attachment and beat until all the ingredients are well incorporated.
3. Add the eggs one at a time, mixing well and scraping any unmixed ingredients from the side of the bowl with a rubber spatula after each addition.
4. Gradually beat in the flour, mixing well after each addition, then turn the mixer up to high speed and beat for a little longer until you get a smooth mixture.
5. Slowly pour in the melted chocolate and mix thoroughly. Pour into the prepared baking tray and smooth over with a palette knife.


Cheesecake


400g cream cheese
150g icing sugar
½ teaspoon vanilla extract
2 eggs


1. Put the cream cheese, sugar and vanilla extract in a freestanding electric mixer with a paddle attachment and beat on slow speed until smooth and thick


2. Add one egg at a time, while still mixing. Scrape any unmixed ingredients from the side of the bowl with a rubber spatula after each addition. The mixture should be very smooth and creamy


3. The mixer can be turned up to a higher speed at the end to make the mix a little lighter and fluffier, but be careful not to overmix, otherwise the cheese will split. Spoon on top of the brownie and smooth over with a palette knife


Bake in the preheated oven for about 30–40 minutes, or until the cheesecake is firm to the touch and light golden around the edges. The centre should still be pale.


Leave to cool completely, then cover and refrigerate for 2 hours, or overnight if possible.


Cream Topping

300 ml whipping cream
100g icing sugar
150g raspberries, plus extra to decorate


33 x 23 x 5-cm baking tray, lined with greaseproof paper


1.Put the cream, sugar and raspberries in a freestanding electric mixer with a whisk attachment and beat until firm but not stiff.
2. Turn the brownie out onto a board and turn the right way up.
3. Spread the topping evenly over the brownie and decorate with more raspberries.


Three layers of goodness! 


A bite of brownie cheesecake with raspberry mousse.. mmm..