Here is the recipe/method of making real marzipan roses as promised. They are extremely easy to make.
1. Roll out the marzipan
2. Use a round thing (a glass, cutter etc.) to make circles on the marzipan (the size depends on how small or big you want your roses to be, but 4 - 5cm would be fine. You need 3 circles for one rose
3. Overlap the three circles with about 1,5cm overlapping (see picture below)
4. Roll the circles vertically and press the half down of the rose, cut it off and seal your rose with fingers (see picture below)
As I will post many marzipan and cream cakes based on the same sponge cake recipe, I am giving the basic recipe that can be used for making all the different marzipan/cream cakes. Usually these cakes have the same basic recipe, but only the fillings are different.
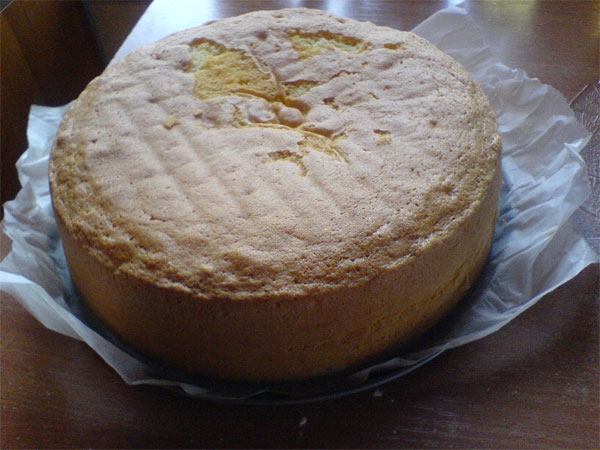
Having tried a lot of different sponge cake recipes throughout the years, I finally found one that I succeed with for the very first time in my life. The main problem was not the texture of the cake, but that it would always, and then I mean always, subside a few minutes after taking it out from the oven. The cake texture would be nice and soft and the cake would also look wonderful while taking it out. But the problem occured when I let it cool and it would subside. This way it made it difficult to divide the cake in even bottoms. Then for some weeks ago I came across this recipe on a norwegian website and decided to give it a try. And believe me I was so happy to see my cake exactly the same as I took it out from the oven even after hours. It did not subside at all. You may watch the video to get the idea of how she is making it, but I am sorry for those who does not understand norwegian. I have translated the recipe, and hopefully you may understand watching the video how it is done.
Sponge cake is the basic cake for a lot of recipes. Specially here in Norway where we makes a lot of cream cakes and
marzipan cakes, sponge cake is a must. You can fill whatever you like and you can garnish it just the way you want. It is only your imaginations that set the limits.
I n g r e d i e n t s :
5 eggs
200 g sugar
200 g all-purpose flour
1 1/2 tsp baking powder
Set the oven at 200C
- Lay a piece of baking sheet on the spring form cake tin, (about 24-26 cm) before you fix it on the sides
- Grease the sides of the cake tin and sift flour inside
1) Whisk the eggs and sugar together until really thick and creamy and the whisk leaves a trail when lifted (about 5 mins)
2) Mix together flour and baking powder in a new bowl
3) Sift it in the egg and sugar mixture
4) Using a spatula, carefully fold in the flour with sharp and clean movements, cutting through the mixture to preserve the air
5) Pour the batter in the cake tin and make an even surface with the spatula
* Put the cake tin on a wire rack and bake at the lowest slot. At the same time turn the temperature down to 170C, bake for about 30 minutes (after 30 mins, use a cake pin to check if the cake is done)
Put a piece of baking sheet on the wire rack and turn the cake over (with the tin) and let it cool
T I P S
~ A trick is to use baking sheet on the sides of the caketin to make the sides even more soft.
- When folding-in, always fold a lighter micture into a heavier one, e.g. sifted flour into creamed or whisked mixture, so the air is not pressed out
- Fill the sponge cake with desired filling, like whipped cream, vanilla cream, jams, fruits, berries etc.
(I will give some basic filling ideas in another post)
Fall is showing it's beautiful colors and the apples are soon to fall down to the ground. The smell of burnt in the slightly cold air and the mild sun. What can be better than a delicious piece of juicy apple cake along with fresh whipped cream and a cup of hot coffee? I must admit, I was never found of apple cake until I discovered this wonderful recipe. It is taken from the norwegian baking book called "Gyldendals Store Bakebok" by Ingrid Espelid Hovig. This baking book is amazing and all of the recipes I have tried out had great results! I will post a picture of the baking book some time.
I am sharing this great recipe that is a must for dark and cold fall nights.

I n g r e d i e n t s :
3 eggs
2 dl sugar
3 dl all purpose flour
1 ts baking powder
100 g butter
Topping
2-3 apples
1 dl chopped almonds
2-3 tbsp sugar
1-2 ts cinnamon (powder)
* Grease a deep oblong cake tin, about 20 x 30 cm / 8 x 12 inches OR a deep round cake tin 24cm diameter / 9,5 inches
Start by preparing the topping as it will take a little time!
Topping
1. Peel the apples and cut them into small slices
2. Make a mixture of sugar and cinnamon and coat the apples, let stand while you prepare the cake
Cake
1. Melt the butter and leave it to cool
2. Beat egg and sugar together to eggnog (about 3-4 min)
3. Sift flour and baking powder together and add into the eggnog
4. Add the melted and cooled butter and mix until just combined
5. Pour the batter into prepared pan6. Stick the apples in a row closely to eachother in the cake mixture and sprinkle the liquid from the apples on the top
7. Sprinkle chopped almonds all over the cake
Bake in a moderately pre-heated oven, at 175C / 347F for about 40 minutes (lowest slot)
Enjoy with a spoonful of whipped cream, vanilla sauce or vanilla ice cream!


